Thinking about moving your domain to another provider? You're not alone. Many website owners reach a point where switching registrars just makes sense.
Maybe you've found a registrar that offers cheap domain renewal, faster support, or easier to use DNS management tools. Or perhaps you just want your domain and hosting under one roof for simplicity.
The good news is that figuring out how to transfer domain name is not a complicated process. You just need to know the right steps and prepare ahead of time. Once you do, the move is quick and seamless.
In this guide, you'll learn exactly how to transfer a domain name safely, efficiently, and without downtime.
Ready to get started? Let's dive in.
1. Before You Start: Key Things to Check
Verify Domain Transfer Eligibility
Check Your Domain Contact Details
Disable WHOIS Privacy Protection
Ensure Your Domain Is Not in the Redemption Period
Summary of Domain Pre-move Checklist
2. Step-by-Step Process: How to Transfer Domain Name
Step 2: Request Your Authorization Code
Step 3: Initiate the Transfer at Your New Registrar
Step 5: Confirm the Transfer via Email
Step 6: Approve the Outgoing Transfer
3. Common Domain Transfer Problems and How to Fix Them
4. Post-Transfer Checklist: What to do After the Move
Before You Start: Key Things to Check
There are a few things you need to do to prepare your domain before starting the transfer to prevent errors and save time. Let's go over them to ensure the process runs smoothly and secure quick approval for your domain transfer.
1. Verify Domain Transfer Eligibility
First, check whether you registered or transferred your domain in the last 60 days. If so, ICANN's transfer lock will prevent you from moving the domain to another registrar during that time. This lock is there for a reason. It actually helps protect against hijacking and unauthorized transfers.
However, if you've had the domain for more than two months and haven't updated your WHOIS details, you should be good to proceed.
2. Check Your Domain Contact Details
Next, check your WHOIS contact information to ensure it is up to date, especially the admin email. You'll receive a message there to verify the transfer request, so it must be current. To be safe, confirm you can access the email and set up recovery options to avoid getting locked out.
💡 Tip: If you need to update your domain ownership or contact details but want to avoid triggering the Change of Registrant lock, you can choose to keep the information as-is and make the changes after the move is finished.
3. Disable WHOIS Privacy Protection
Another step people often miss is leaving WHOIS privacy enabled, which can slow down your domain transfer. If it's currently hiding your contact info, turn it off right away. The new registrar needs to see your real email to send the verification message.
Once you turn it off, the change usually takes under an hour to appear, though it can take up to 24 hours to show across the global WHOIS database. You can turn domain privacy back on with your new registrar once the transfer is finished.
4. Review Your DNS Settings
Additionally, your DNS settings might need some attention before transferring your domain.
During a domain transfer, your nameservers usually stay the same if you only change registrars and do not move where you manage your DNS records. For instance, you could be handling this with your current web host's control panel or a third-party service like Cloudflare. In that case, your website and email will continue to work without any DNS changes.
If you're also changing DNS management to a different service, such as a new host, your new registrar, or a third-party DNS provider, you'll need to update your nameservers after the transfer. But before doing that, make sure to back up your existing DNS records.
Pay close attention to your email-related records. MX, SPF, DKIM, and DMARC are especially important to keep email delivery uninterrupted. Depending on your setup, you may also need to recreate A, CNAME, or TXT records.
If you are unsure where your DNS lives, check which nameservers your domain currently uses before you make any changes. One easy way is to run a search on ICANN’s WHOIS lookup tool, which shows the nameservers linked to any domain.
5. Ensure Your Domain Is Not in the Redemption Period
When your domain expires, it enters a grace period of 30-36 days, depending on your domain policy. You can still transfer it during this time. But if you miss this window, the domain enters the "redemption period" and may go to auction. At that point, you can't transfer it unless you pay a restoration fee.
So, to avoid extra costs or losing your domain, transfer it before the grace period ends, or better yet, before it expires.
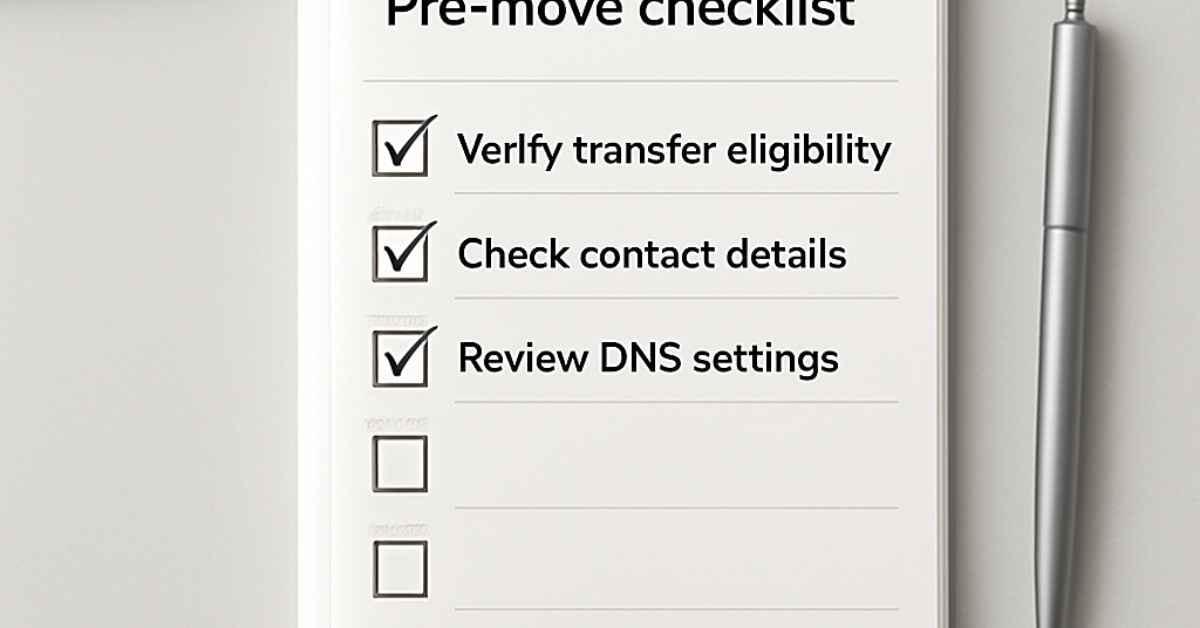
Summary of Domain Pre-move Checklist
| Checklist Item | Status to Ensure Successful Transfer |
|---|---|
| Registration Age | Older than 60 days |
| Admin Email | Accessible |
| Domain Privacy | Disabled |
| Expiry Date | More than 7 days away (recommended) or within 30 days after expiry |
💡 You Might Also Like: What is a Domain Name for a Website: Best Guide for Beginners
Step-by-Step Process: How to Transfer Domain Name
Once you've ticked all the boxes in the domain pre-move checklist, you are ready to begin the move. Following these steps in order will ensure you maintain control over your asset and avoid common technical hurdles. So, without further ado, here is exactly how to transfer domain name to your new provider.
Step 1: Unlock Your Domain
Log in to your current registrar's control panel and locate your domain management settings. Look for a toggle labeled "Transfer Lock" or "Domain Lock" and switch it to Off.
Step 2: Request Your Authorization Code
After unlocking your domain, you need your EPP Code or Authorization Code. You can request for this within your current registrar's dashboard.
Once sent to your admin email, check your inbox to retrieve this unique string of characters. Copy the code exactly as it appears. (Be careful not to grab hidden spaces—we’ll cover why this is a common trap in the troubleshooting section below).
Step 3: Initiate the Transfer at Your New Registrar
Head over to the website of your new provider and find their "Transfer" page. Enter your domain name into their search tool. When prompted, paste the Authorization Code you received in Step 2. This proves to the new registrar that you have the right to move the domain.
Step 4: Pay for the Transfer
At this stage, you will be asked to checkout. Most registrars include a one-year extension on your domain's expiration date as part of the transfer fee. Once the payment is processed, the new registrar will formally request your domain from the old provider.
Step 5: Confirm the Transfer via Email
Shortly after you pay, the "losing" registrar will send a Form of Authorization (FOA) to your administrative email address. This is a critical security step required by ICANN. You must open this email and click the confirmation link to verify that you intentionally requested the move. If you don't see it within an hour, check your spam folder, as these automated emails are frequently flagged.
Step 6: Approve the Outgoing Transfer
By default, most registrars hold your domain for 5–7 days before releasing it to the new provider. However, you can often speed this up with one more last step. Simply, log into your old registrar's dashboard and look for a section labeled "Pending Transfers" or "Transfers Out". Many providers, such as GoDaddy or Namecheap, allow you to click a button to "Approve Transfer" manually. Doing this can reduce your total wait time from a week to just a few minutes.
💡 You Might Also Like: How to Choose a Good Domain Name for Your Website
Common Domain Transfer Problems and How to Fix Them

If you’ve followed the steps but your domain transfer still won't budge, check these three common "invisible" blockers:
- The "Copy-Paste" Space Trap: When you copy your EPP/Auth code, it’s incredibly common to accidentally grab a "hidden" space at the beginning or end. If your new registrar says the code is "invalid", try typing it out manually without changing case or pasting it into a plain text note first to strip any extra spaces.
- The Second Verification Email: Most people look for the email from the new registrar, but many old registrars send a second "Confirm you want to leave" email. If you don't click "Approve" in that second email, the transfer might sit in "Pending" for the full 5–7 days instead of finishing quickly.
- The "Special TLD" Exceptions: If you are moving a non-standard domain (like a .co.uk or .io), the rules can change. For example, .uk domains don't use Auth codes; they require you to change the "IPS Tag" to your new registrar’s name. Double-check if your specific extension has a unique requirement.
Post-Transfer Checklist: What to do After the Move
Once you have approved the move, the registry will update its records. You will receive a final "Transfer Successful" email from your new registrar. At this point, you should log in to your new account to:
- Check your transfer status: Ensure the domain is listed as "Active".
- Re-enable Domain Privacy: If you disabled it for the move, turn it back on now.
- Verify DNS Records: Ensure your website and email are still pointing to the correct servers in your new DNS zone.
- Enable Domain Lock: Re-lock the domain at the new registrar to keep it secure.
How to Transfer a Domain Name Without Downtime
A common fear is that your website will go offline when transferring a domain. In reality, the transfer process itself doesn’t cause downtime; any outages are usually due to DNS changes.
To ensure a seamless transition, keep these points in mind:
- Don’t Touch the Nameservers Mid-Transfer: If your website is currently live, keep your domain pointing to your old host's nameservers until the domain transfer is fully complete. This ensures your site stays live while the registry updates happen in the background.
- Observe the 48-Hour Rule: If you plan to switch web hosts at the same time, wait until the domain is safely in your new registrar's account before changing DNS records. DNS propagation can take anywhere from a few minutes up to 48 hours. Waiting until after the domain transfer successfully prevents your site from being “lost” between two providers.
- Duplicate Your DNS Records: If your new registrar provides DNS hosting and you plan to manage DNS there, manually recreate your A, MX, and other relevant records in the new dashboard before updating the nameservers. This way, the new “road map” is ready when the switch happens.
- Run a “Success” Test: Use a tool like DNSChecker.org or WhatsMyDNS.net to verify that your transfer and DNS changes have fully propagated. Just enter your domain name to check servers worldwide. This gives you a final “green light” that your move was successful.
Your Domain, Your Choice
So, there you have it. That's pretty much what you need to know on how to transfer domain names. By following this guide, you'll be able to successfully navigate the technical "handshake" between registrars while keeping your website live and your data secure.
Remember, your domain is your most valuable digital asset. With this knowledge, you’re free to move your domain whenever a better deal or improved service comes along.
FAQs on How to Transfer a Domain Name
Yes, you usually pay a domain transfer fee when you move to a new registrar. However, this isn't actually a "moving fee." It usually adds one full year of registration. Think of it like paying for your domain renewal in advance. While some companies offer a free domain transfer, they usually mean the move itself is free but you still pay for that one-year extension.
Most .com transfers cost between $15 and $20. Just watch out for extra costs like domain privacy. Some providers give it to you for free, while others charge a small extra fee to keep your personal info hidden.
Most domain transfers take between 5–7 days to finish. The exact time depends on how fast your current provider releases the name. Some types of domains can move in just a few hours, while others may take up to two weeks. To speed things up, make sure your domain is unlocked and you have your "Auth Code" ready before you start.
No. In most cases, you keep your existing time. Your new registrar will simply add one year to your current expiration date.
Keep in mind that some country-specific domains (like .uk or .ca) work differently. They may not add a year or might have special rules. It is always a good idea to check the domain transfer policy with your new provider first.
Yes, you can still transfer an expired domain if it is in the "grace period". This usually lasts for 30 days after the expiration date.
After this time, the domain enters a "redemption period". If this happens, you must pay an extra fee to your current provider before you can move the domain. To keep things simple, try to start your transfer at least seve7 days before your domain expires.
No, you do not need to pay a renewal fee if the domain is still in its "grace period." This period usually lasts for 30 days after the domain expires.
However, if that time has passed, the domain enters a "Redemption Period." In this case, you must pay a fee to reactivate the domain before you can move it. Once it is active again, you can start the transfer.
A domain transfer is when you move a domain from one registrar to another. You might do this to get better prices or better service. This process usually costs a fee, requires an "Auth Code," and adds one year to your registration.
On the other hand, a domain push moves a domain between two different accounts at the same registrar. This is ideal for selling a domain or moving assets between your own accounts. It is free, does not require an Auth Code, and keeps the same expiration date. Because it stays with the same provider, the move usually happens instantly.